Amazon Web Services Feed
How to Provision and Deploy SSL/TLS Certificates Using ACM

Looking for a detailed, step-by-step guide on how to provision and deploy SSL/TLS certificates using ACM? You’ve reached the destination!
AWS Certificate Manager (ACM) is a service that enables you to establish your website’s identity and secure network communications. This is because ACM allows you to provision, manage, and deploy Transport Layer Security (TLS)/ Secure Sockets Layer (SSL) for public and private data on the cloud. With ACM, you eliminate the hassle of having to purchase/upload and renew SSL/TLS certificates manually. The manager quickly and efficiently requests a certificate, deploy it on AWS resources, and handles the renewal of certificates.
While it reduces the time and effort required to acquire SSL/TLS certificates for your cloud-based application/website, using ACM and its public integrated services are free. Your only expenses arise from the AWS resources you use when running the application. Services that are integrated with ACM include Elastic Load Balancing, Amazon CloudFront, and API Gateways. With the ACM Private Certificate Authority, you can provision private certificates for internal compliance.
Enroll Now: SSL/TLS Basics Training Course
How to Provision and Deploy SSL/TLS Certificates Using ACM
As mentioned above, the AWS Certificate Manager allows you to provision and deploy SSL/TLS certificates so you can establish your website’s identity and secure network communications. Here is the detailed guide on how to provision and deploy SSL/TLS certificates using ACM.
Step 1: Use your Amazon Account Credentials to Log in to the AWS Homepage. If you are new to Amazon Web Services, you can sign up for a free-tier AWS account. This gives you free 1-year access to most of AWS Services and Resources and is perfect for personal projects. Click here to sign up.
Step 2: On the AWS Homepage, under My Account, click on the AWS Management Console to access the Amazon services dashboard.

Part 1: Provisioning your Certificate
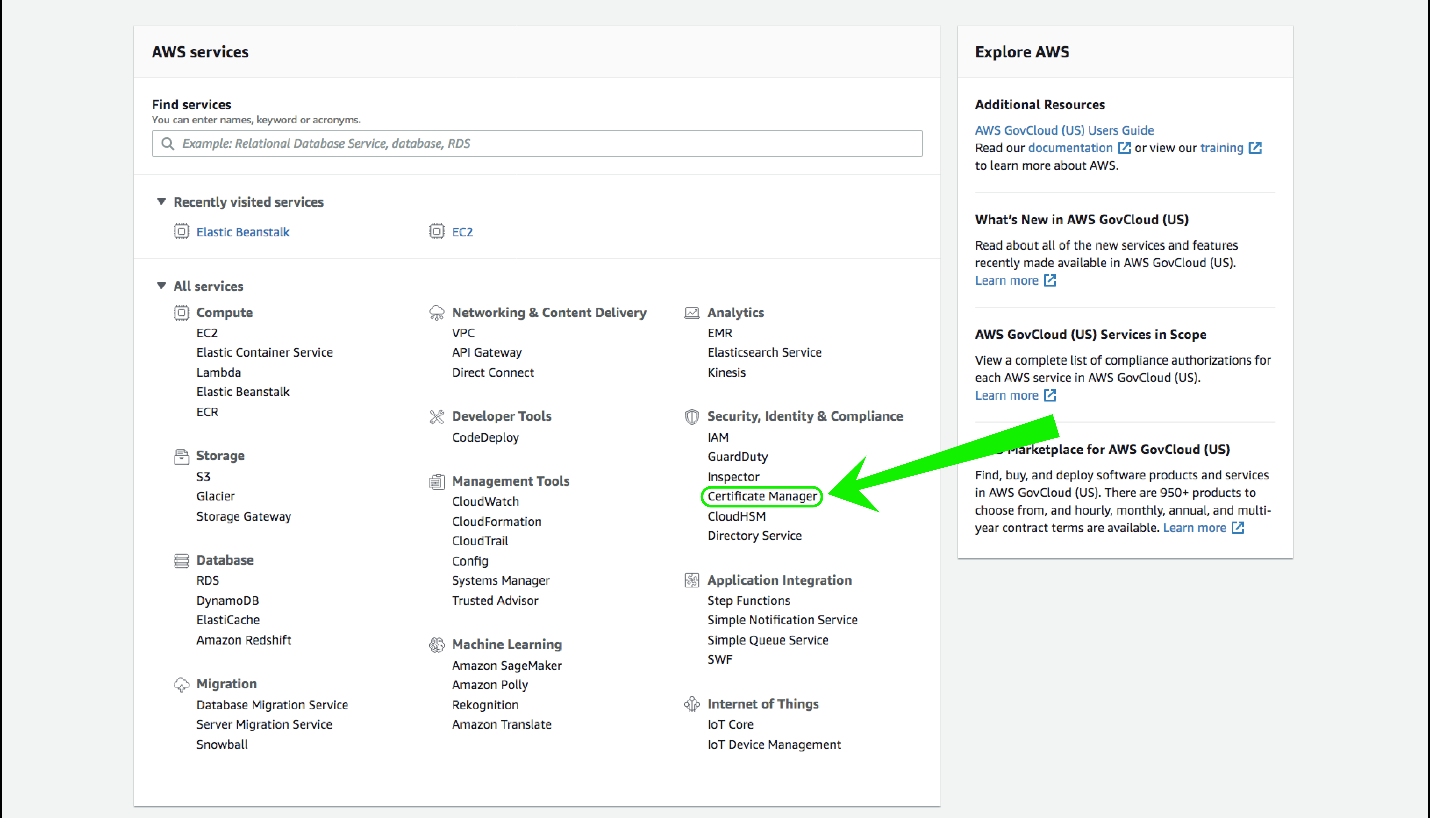
Step 3: Next, you will be directed to the AWS services dashboard. This is where you access all Amazon Web Services resources you can use for your projects.
Under the Security, Identity & Compliance category, click the Certificate Manager to access the AWS Certificate Manager tool.
Quick Tip: Amazon’s ACM was designed to automate all tasks associated with the renewal, deployment, and provisioning of SSL/TLS certificates. You can, therefore, use it to secure your application/website, achieve compliance with legislative standards, to improve your data availability and to secure your firm’s internal resources.
Follow the steps below to import your SSL/TLS for more secure, responsive, and automated cloud-based applications.
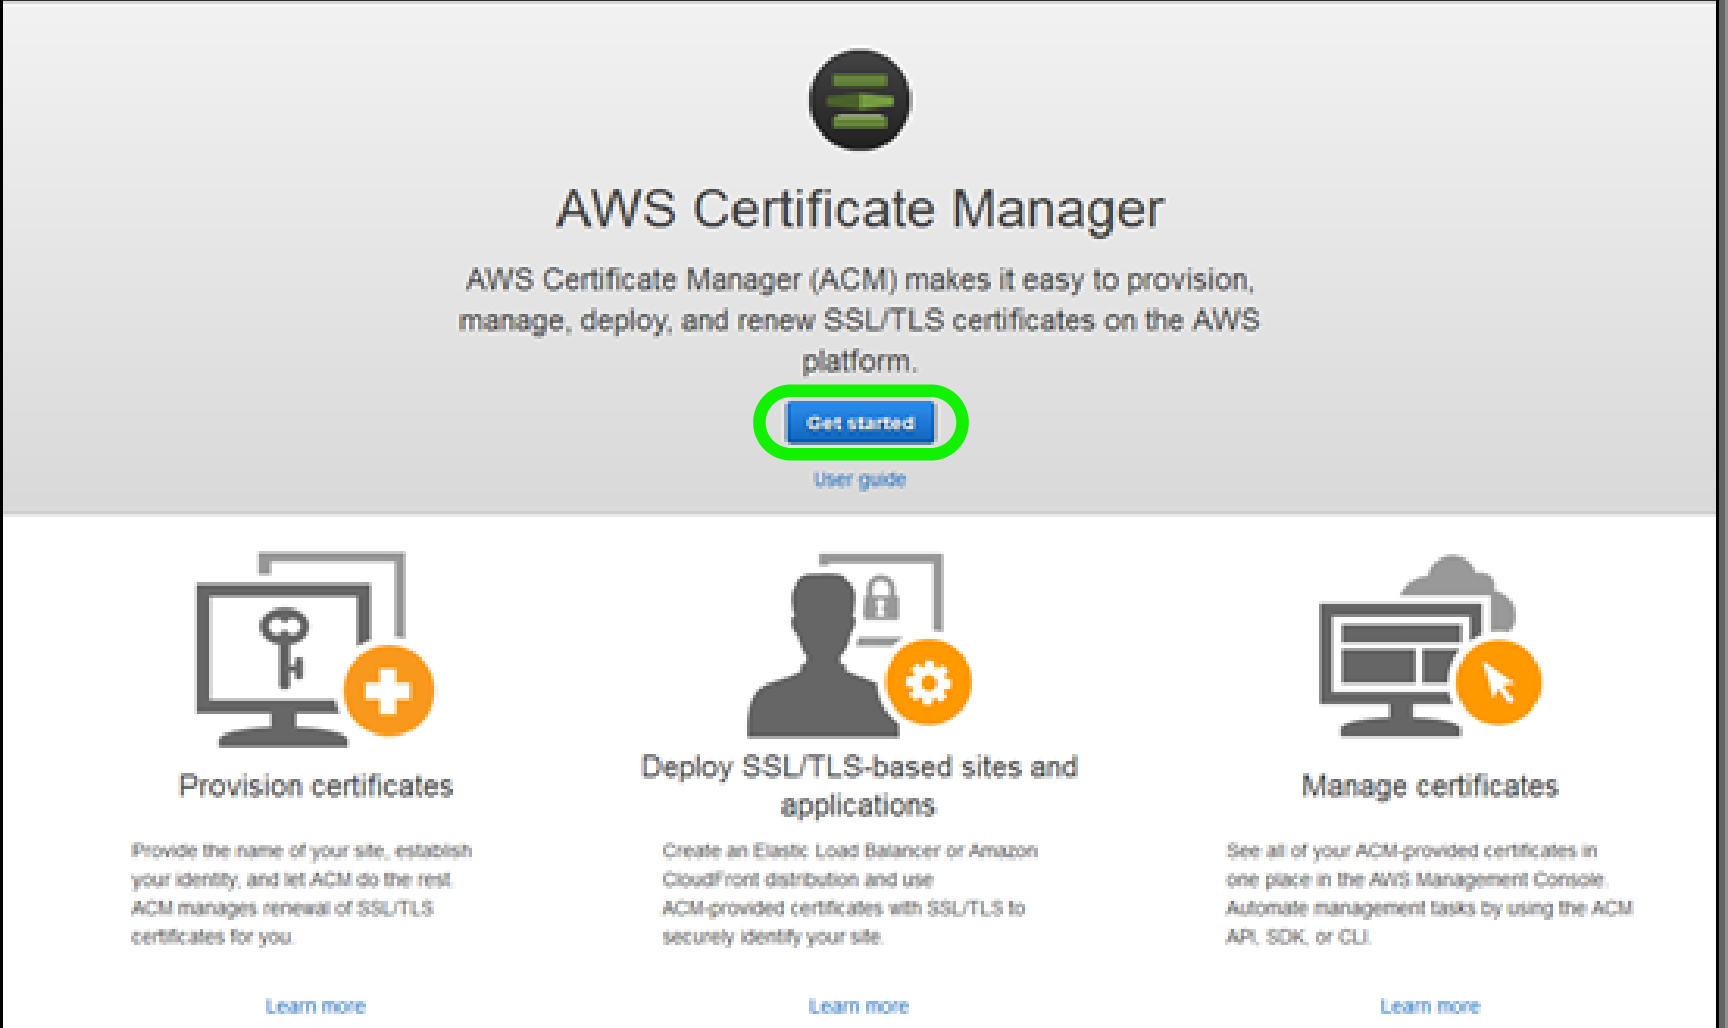
Step 4: Clicking on Certificate Manager in the services dashboard takes you to the ACM Console, where you can provision, deploy, and manage your SSL/TLS certificates.
Once in the AWS Certificate Manager Console, click on Get started.
Step 5: When it comes to provisioning certificates, you have two options.
- The first option, Import Certificate, obtains the domain(s) from the certificate. This certificate is usually your own, meaning you already gave it a domain name.
- The second option, Request Certificate, obtains a public certificate from Amazon. In this case, you provide a fully qualified domain name of the website you want to protect. If you want to provide a wildcard certificate that will cover multiple pages within the same domain, use an asterisk instead of ‘www’ in the site’s full domain name.
For our example, we will be requesting, provisioning, and deploying certificates for a site called samplesite.com. Since we want to secure both the top-level domain and higher-level subdomains it contains.

Step 6: Once you have provided the domain names, click on Review and Request. This sends you to a confirmation page displaying the names of sites you want to secure. If any of these does not match your intentions, click on the previous button. If your review seems perfect, you can click on Confirm and Request.

Review Domain Names
Step 7: Once you have confirmed your chosen domain names, AWS emails a certificate approval form to the owner the domains are registered under. Head up to your email inbox, and you will find one email from certificates.amazon.com for each domain you chose.
On the form in your inbox, click on the Amazon Certificate Approval link.
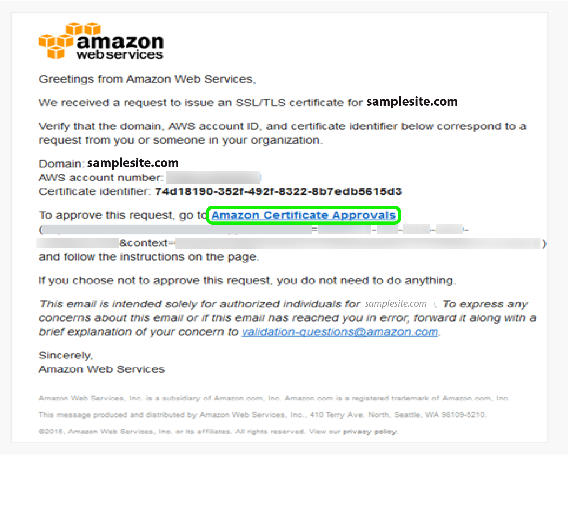
Step 8: You’ll be redirected to an Amazon Web Services confirmation page. Click I approve once you are sure that the information you provided is correct.

Once you have approved, you can view your certificate in the ACM console.
Part 2: Deploying your SSL/TLS Certificate
Once your certificate has been issued, you can deploy it to ACM-integrated services like CloudFront Distributions and Elastic Load Balancing. For this example, we shall deploy our certificate to the Elastic Load Balancer.
Step 9: Log in to the AWS console. Under Services, select EC2.
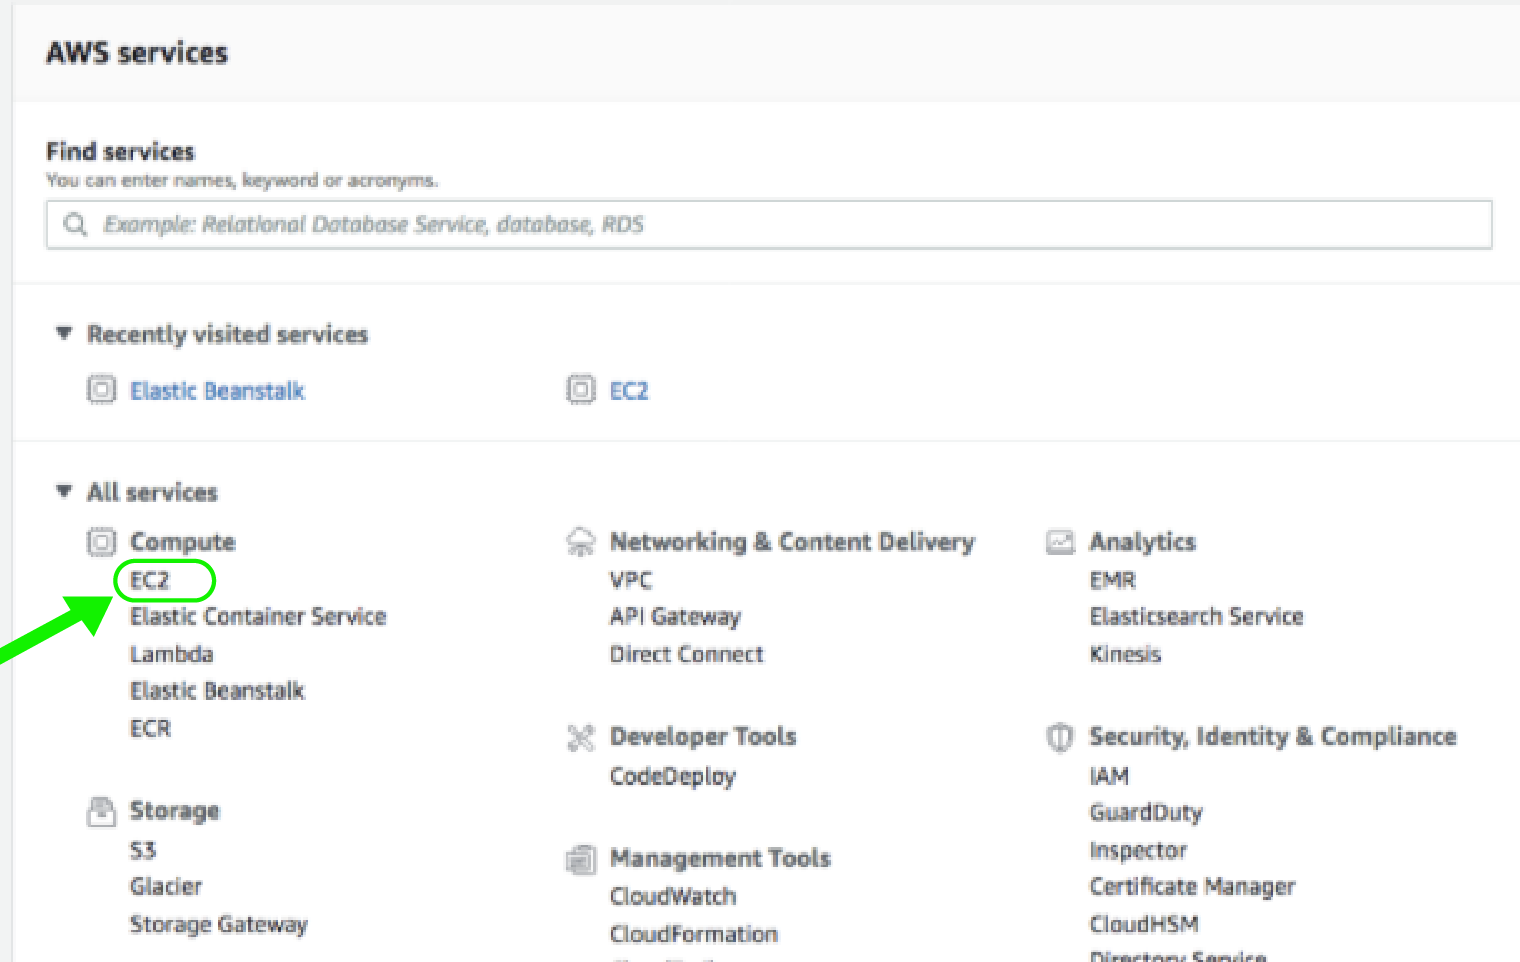
Step 10: . From the EC2 dashboard, select Load Balancers from the Load Balancing menu.
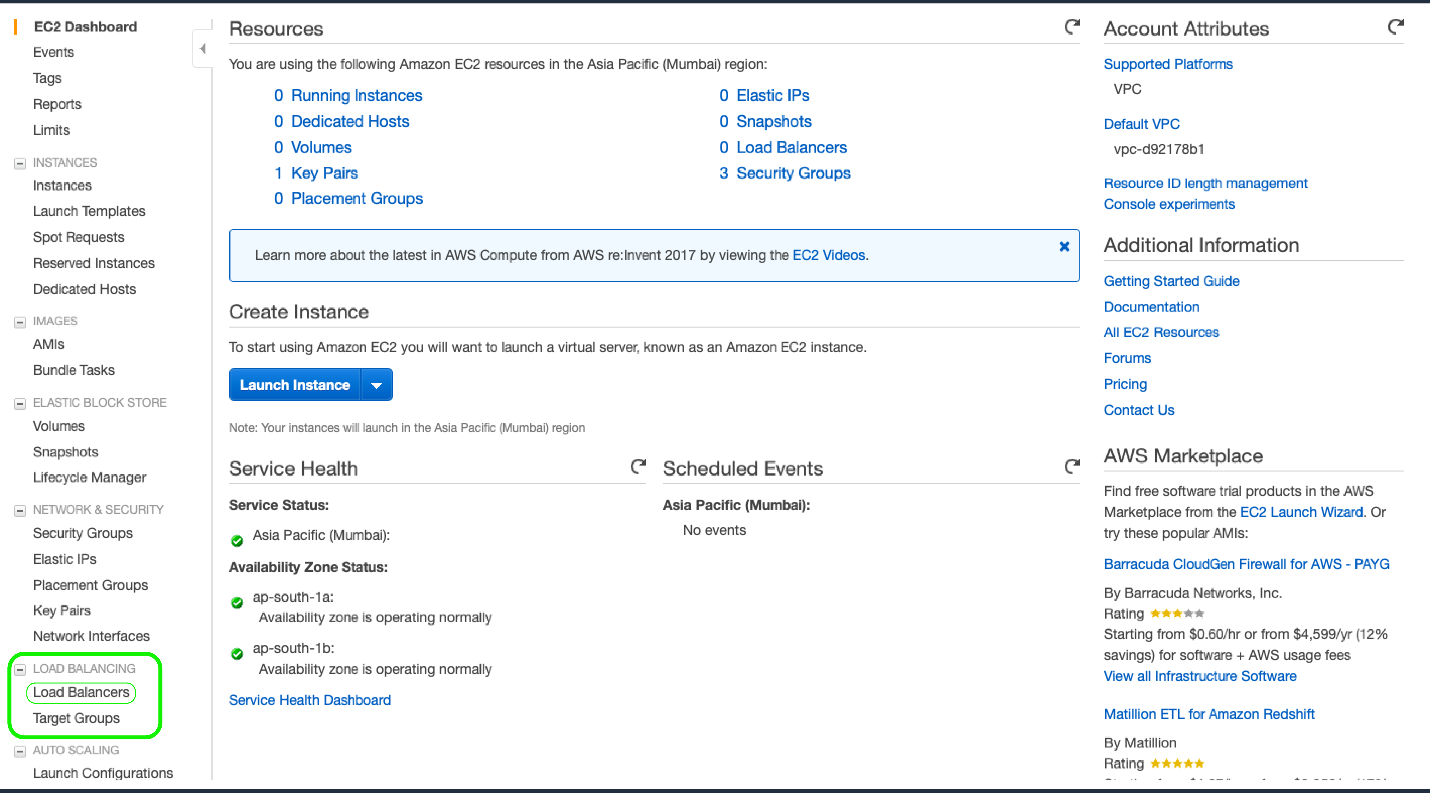
Step 11: On the load balancing dashboard, click on ‘Create Load Balancer’.

Step 12: The next page asks you to Select load balancer type. For this example, we’ll click Create under the Application Load Balancer option.
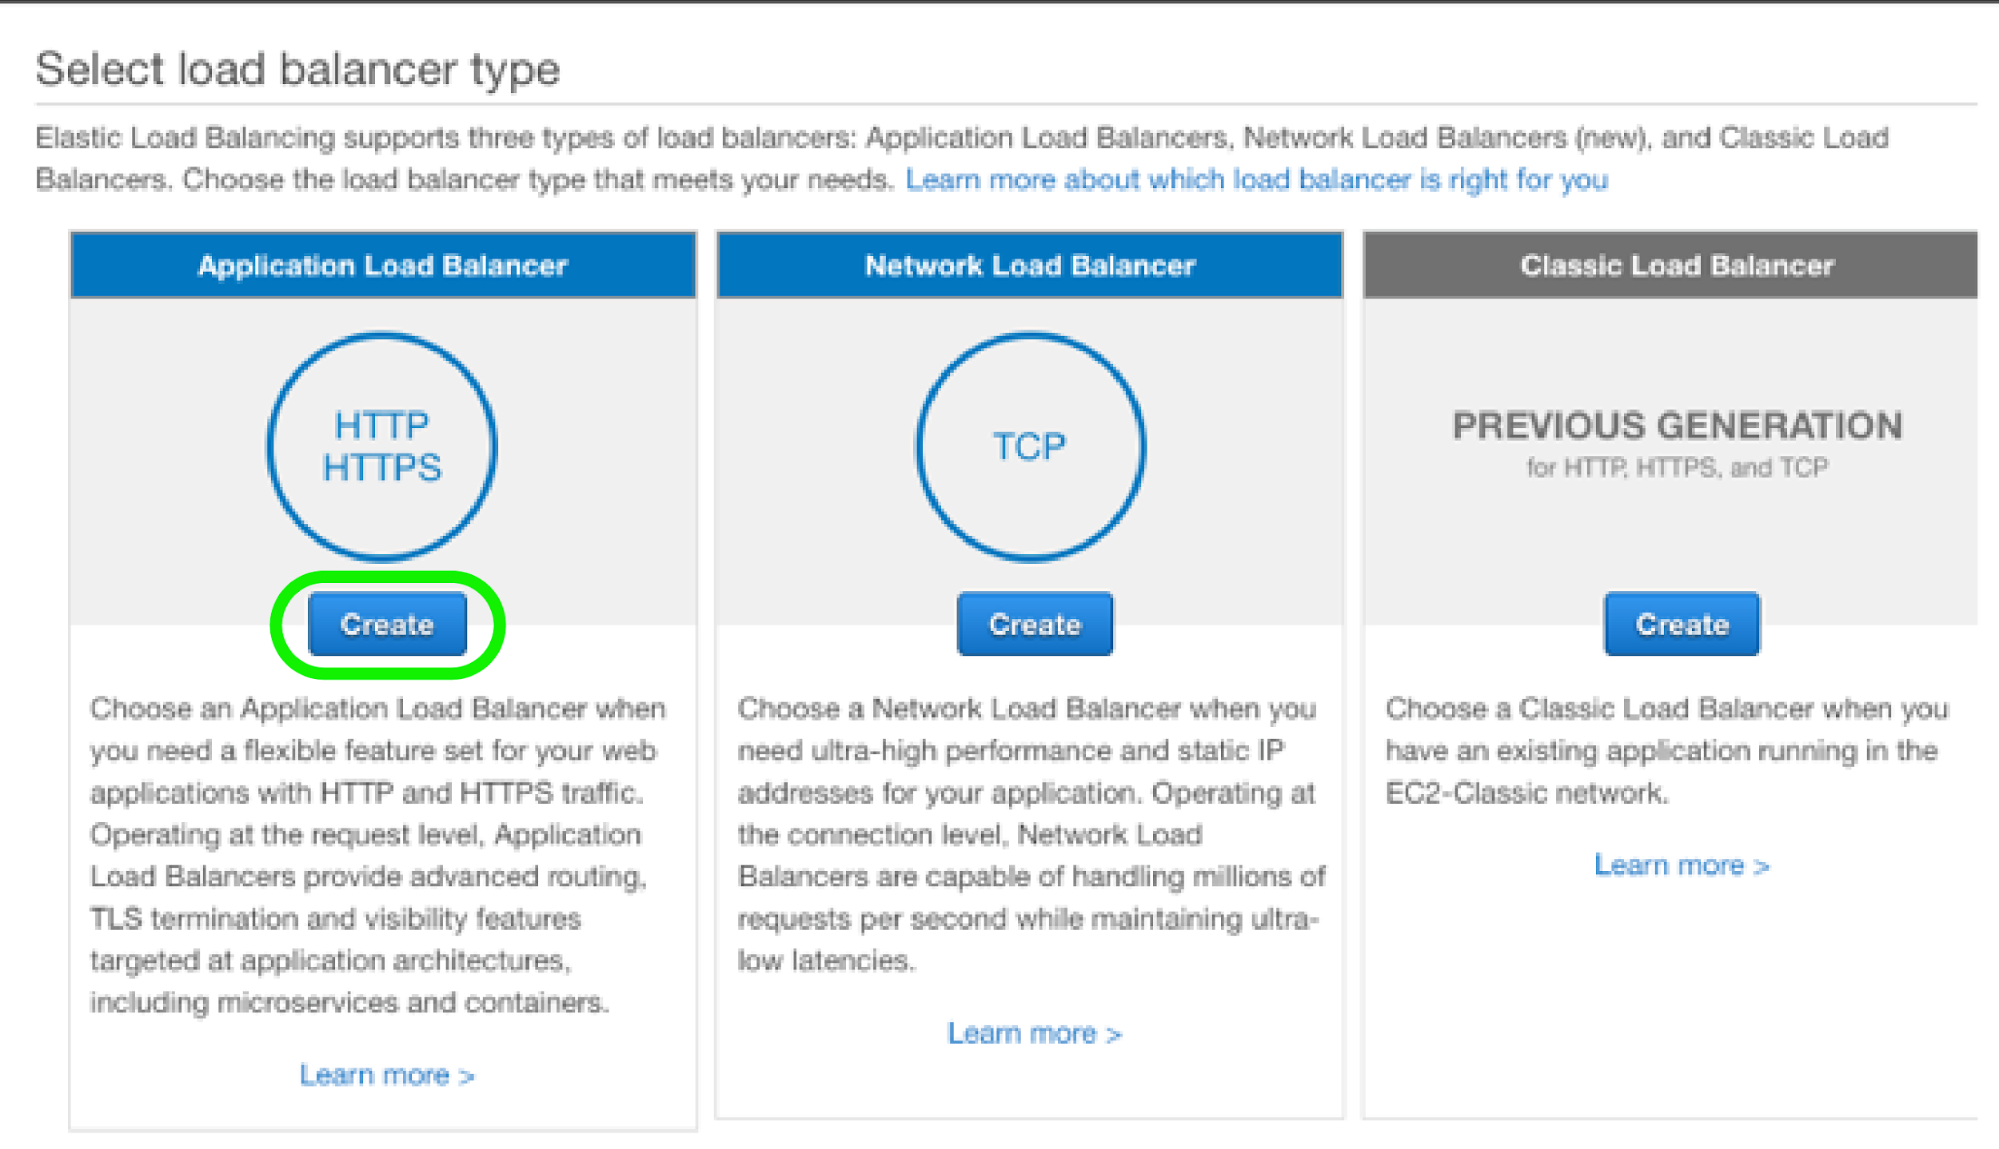
Step 13: To deploy your SSL/TLS certificate, head to the Configure Security Settings tab. Your certificate should be visible on the list of open certificates.
In the Select Certificate type field, select Choose an existing certificate from AWS certificate manager (ACM). Select your certificate from the list of open certificates beneath this field. You have now successfully deployed your security certificate to Amazon’s Elastic Load Balancer.

Since the Elastic Load Balancer (ELB) supports SSL offload, deploying your SSL/TLS certificate on the AWS ELB will reduce the load of encryption and decryption on your EC2 instances.
Final Words
Provisioning and deploying SSL/TLS is a great way to establish your website’s identity on the cloud. This technique also lets you secure internet communications. We have gone through the steps required to provision and deploy SSL/TLS using ACM in AWS. ACM reduces the manual work involved in creating and managing encryption standards for secure network communication. With ACM, you can always be sure that your data is safe, protected, and available.
So, just follow this detailed guide to the provision and deploy SSL/TLS certificates using ACM, and establish the identity of your website with secure internet communications. If you want to learn the basics of SSL/TLS, you can enroll in our SSL/TLS Basics Training Course and learn the concepts of SSL/TLS certifications.
Also, provisioning and deploying SSL/TLS certificates in AWS using AWS Certification Manager is an important topic for the AWS Certified Solutions Architect Associate and AWS Certified SysOps Administrator Associate certification. So, if you are preparing for any of these, this guide will be very helpful for you. You can also check AWS Certified Solutions Architect Associate and AWS Certified SysOps Administrator Associate training courses and practice tests that will help you to prepare and pass the certification exams.
The post How to Provision and Deploy SSL/TLS Certificates Using ACM appeared first on Whizlabs Blog.

